Core Components and Working Principle of a Plastic Cup Printing Machine
Definition and Principles of Pad Printing in Plastic Cup Customization
Pad printing allows for accurate placement of intricate designs on those tricky curved or oddly shaped plastic cups thanks to a special silicone transfer method. This technique actually works around the problem of putting flat artwork onto three dimensional objects. The secret lies in a flexible silicone pad that molds itself to whatever surface it needs to print on. To get started, ink fills up the tiny grooves carved into either metal or plastic plates known as clichés. Then comes the magic part where the silicone pad grabs hold of this ink image and carefully places it exactly where needed on the cup surface. What makes this work so well is how it maintains detail quality even when dealing with all sorts of bumps and curves that regular printing methods just can't handle.
Key Role of Silicone Pad Transfer Technology in Ink Application
The success of ink transfer really depends on those silicone pads because they're elastic enough (around Shore hardness 40 to 60) and actually bond well with ink chemically. These pads can handle all sorts of surface irregularities without messing up the print quality when running at full speed through production lines. Most heat resistant silicones can take about 20 to 30 cycles each minute, and when compressed between half a millimeter to 1.5 mm, they let go of the ink completely. What makes them special is their water repelling property which stops ink from spreading where it shouldn't on rough or bumpy surfaces. Some studies looking at how polymers stick together show these systems manage to transfer more than 95 percent of the ink, something absolutely necessary for making sure those durable, food safe prints last on things like drink cans and bottles.
Machine Components Such as Transfer Pads and Printing Plates Explained
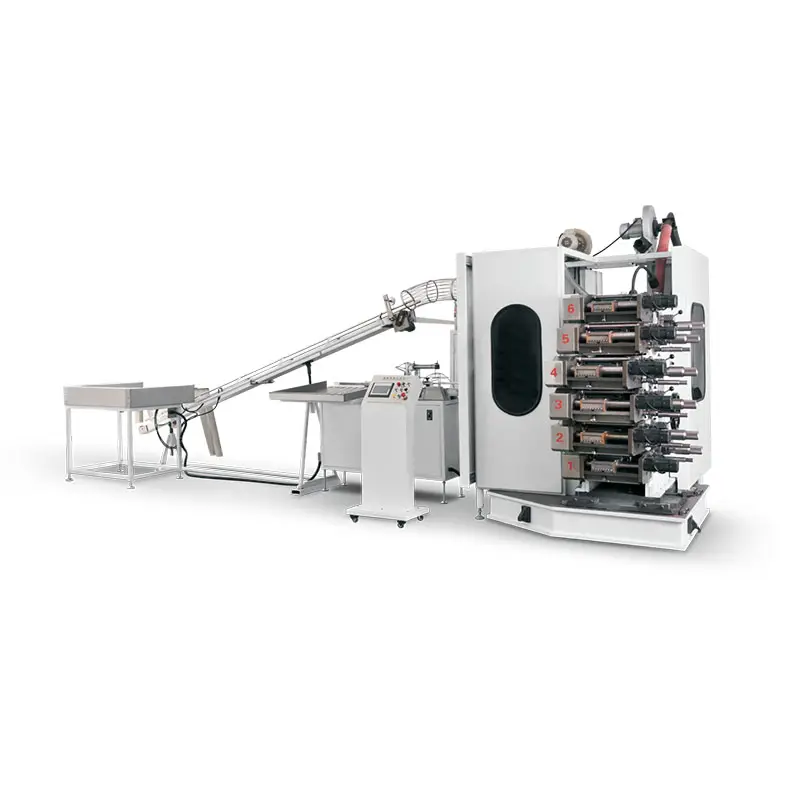
A typical plastic cup printing machine integrates three core subsystems:
| Component | Function | Technical Specification |
|---|---|---|
| Cliché | Holds engraved design pattern | Steel plates with 15–25µm engraving depth |
| Ink Cup | Seals and distributes ink | CNC-machined stainless steel with ±0.01mm tolerance |
| Transfer Pad | Media for ink transfer | FDA-grade silicone with 180°–220° tear resistance |
Precision alignment systems maintain positional accuracy within 0.05 mm over 10,000+ cycles, enabling consistent decoration of logos, safety markings, and rim graphics on disposable cups.
Step-by-Step Pad Printing Process for Plastic Cups
How the Sealed Ink Cup Ensures Consistent Ink Supply on Cliché
When the sealed ink cup makes contact with the engraved plate, it fills all those little grooves with ink without letting solvents escape into the air. The whole setup works like a closed system that keeps the ink at just the right consistency even during long production runs. Then comes the part where the cup pulls back out of the way, and this thing called a doctor blade scrapes off any extra ink that wasn't needed. What's left behind is only what sits in those carved-out design sections. This means every single plastic cup coming off the line looks pretty much identical to the last one, which is exactly what manufacturers want when they need consistent results from their printing machines over thousands of units.
Ink Transfer Mechanism from Engraved Plate to Silicone Pad
When the silicone pad comes down on the inked cliché, it bends just enough to pick up all those tiny details in the image. Most pads used for cups have a Shore hardness somewhere around 40 to 60 degrees, which gives them the right mix of give and strength. The pad stays in contact for about half a second to two seconds while the solvents in the ink start working their magic. What happens next is pretty neat: the ink actually sticks better to the pad than it does to the metal plate underneath. This means cleaner transfers and images that stay sharp even after printing.
Precision Alignment and Contact Pressure During Pad Impression
The system achieves positional accuracy down to around 0.01 mm, so the inked pad lines up spot on with where it needs to go on those plastic cups. Pressure from pneumatic cylinders can be adjusted between roughly 3 and 15 psi depending on how thick the cup walls are and what kind of material they're made from. When it comes to pad compression, we typically work within a range of about 30% to 70%. This helps account for all sorts of variations that happen during blow molding processes. Sometimes cups come out a bit oval shaped or have slight warps here and there. The controlled compression makes sure the pad still makes complete contact without actually deforming the cup itself.
Release and Retraction Dynamics for Clean Image Replication
When the pad pulls back, its ability to bounce back causes a peeling motion starting from the middle and moving outward. This helps reduce smearing and keeps those tiny details intact. The material has pretty low surface tension around 20 to 24 mN/m which makes it easier for ink to let go cleanly. Before printing though, most manufacturers treat the cup surface either with fire or some kind of plasma treatment. This step really matters because without proper adhesion, important stuff like barcodes on food packages just won't print right. Nutrition facts labels need to be clear too so customers can read them properly at grocery stores.
Design Preparation and Engraving for Custom Plastic Cup Decoration
Digital Design Conversion for Printing on Curved or Irregular Surfaces
When preparing artwork for cylindrical cups, designers need to adapt it using vector based tools that handle curves and distortions properly. Industry professionals rely on specific software packages that create a virtual 3D model of the finished product. This lets them tweak sizes and shapes so company logos won't get stretched out when printed around those curved surfaces, even when wrapping almost all the way around at angles approaching 250 degrees. Getting these adjustments right makes sure the brand looks good everywhere on the cup, which is really critical for products where companies want their logo to wrap completely around containers that are typically about twice as tall as they are wide.
Creation of Engraved Plates (Cliché) for Accurate Image Reproduction
The clichés themselves can be made either from hardened steel or various polymers depending on what works best for the job at hand. These are then engraved using industrial lasers that create those tiny cavities matching exactly what the design requires for proper ink distribution across curved surfaces. Most modern setups manage to get cavity depths somewhere between 10 and 40 microns, give or take about 2 microns either way, which keeps the amount of ink deposited pretty much the same every time. Smart machines adjust things like laser power levels ranging from around 50 watts up to 200 watts, while moving at speeds anywhere from half a meter per second all the way to three meters per second. This flexibility means they can handle everything from intricate line work down to large areas needing solid coverage without missing a beat.
Material Selection and Treatment for Optimal Ink Adhesion
Manufacturers looking to get good ink adhesion on plastic cups need to treat the surfaces first. For polypropylene and polyethylene materials, there are two main options available. Corona treatment works by boosting surface energy levels between around 40 and 60 mJ per square meter. Plasma systems offer another approach that typically brings dyne levels up from about 31 to somewhere near 54 mN/m on those PE surfaces. What these treatments actually accomplish is better wetting properties and stronger adhesion. The results speak for themselves too - some facilities report getting close to 98% ink transfer efficiency after proper treatment. And durability remains intact even after hundreds of wash cycles, which makes them ideal for NSF certified containers that need to be reused repeatedly in food service applications where safety standards are paramount.
Overcoming Challenges in Printing on 3D and Complex-Shaped Plastic Cups
Adaptability of Silicone Pads to Print on Plastic Materials With Contours
Silicone pads fit pretty well on those tricky cup shapes that are curved, ribbed, or have those fluted designs when compressed properly. When picking the right hardness level between 20 and 60 on the Shore A scale, engineers need to find that sweet spot between how flexible the material is so it can wrap around contours, but still maintain enough bounce back properties to keep printed images sharp and clear. Because of this flexibility, pad printing works great on detailed objects such as those ribbed tumblers people love these days or even fancy cocktail glasses that have all sorts of interesting surface patterns going on.
Overcoming Challenges in Printing on Non-Flat Plastic Cup Surfaces
Reliable printing on uneven surfaces relies on three key factors:
- Angular Adaptation – Pads can tilt up to 15° during transfer to match asymmetrical contours
- Viscosity Control – High-solids inks (65–75% solids by weight) resist flow on inclined or vertical surfaces
- Surface Pretreatment – Plasma etching enhances adhesion on low-energy plastics like polyethylene by 40%, as verified under ASTM D3359-23
Applications in Printing on Bottle Caps and Beverage Packaging
The same technology applies batch codes to polypropylene caps and full-color graphics on PETG tumblers. Modern machines handle print areas as small as 2 mm² (e.g., pharmaceutical lids) or wrap 360° designs around large stadium cups, offering unmatched versatility across packaging formats.
Industry Paradox: High Precision vs. Variable Surface Geometry
Advanced systems resolve the tension between precision and variability through dynamic adjustments:
- Real-time cliché positioning (±0.1 mm accuracy)
- Adaptive pad pressure control (10–50 N/cm²)
- Multi-stage UV curing to address shadowed or recessed areas
This capability explains why 78% of decorated plastic containers now use pad printing (FTA 2023 Annual Report), despite increasing competition from direct digital methods.
Automation, Maintenance, and Quality Control in High-Speed Production
Integration of Plastic Cup Printing Machine with Forming and Stacking Systems
Modern pad printing units integrate seamlessly with thermoforming and stacking lines via PLC-driven automation, supporting production speeds exceeding 2,500 cups per hour. Closed-loop synchronization ensures smooth material flow from molding to printing to packaging, maintaining registration accuracy within ±0.3 mm across continuous operations.
Application in Food-Safe and High-Speed Production Environments
Food-grade printers utilize NSF-certified silicone components and low-VOC, UV-curable inks that harden instantly under LED arrays. A 2023 FDA compliance study found these systems reduce contamination risks by 84% compared to manual decoration, while sustaining cycle rates of 45–60 impressions per minute in hygienic environments.
Real-Time Quality Inspection for Print Clarity and Alignment
Automated vision systems equipped with industrial cameras perform 360° inspections at 120 frames per second, detecting defects such as smudging or misalignment beyond 0.5 mm thresholds. Machine learning models trained on over 50,000 defect samples deliver 99.7% detection accuracy, aligning with industry benchmarks for zero-defect manufacturing.
Routine Maintenance of Ink Cups, Pads, and Cliché
| Component | Maintenance Frequency | Key Task |
|---|---|---|
| Silicone Pad | Every 8 hours | Clean with isopropyl alcohol |
| Cliché Plate | Daily | Inspect engraving depth (≥25µm) |
| Ink Cup | Weekly | Replace wiper blades |
Common Issues in Pad Printing Process and Strategies to Minimize Downtime
About 12 percent of print jobs experience partial ink transfer based on recent production data from 2024. Most operators fix this issue by tweaking the pad hardness between 60 and 80 on the Shore A scale or boosting impression pressure somewhere around 15 to 20 percent. The newer quick change cartridge systems make it possible to swap out worn components like printing pads, cliches, and ink cups within roughly 90 seconds. This has cut down machine downtime during shifts dramatically, going from an average of 22 minutes down to barely over 3 minutes now. For production managers, these kinds of improvements mean fewer interruptions and better overall throughput across the facility.
FAQ
What is the main advantage of pad printing on plastic cups?
The main advantage is its ability to print intricate designs on curved or irregular surfaces, maintaining detail quality even on bumpy surfaces.
How often should the silicone pad be cleaned?
The silicone pad should be cleaned every 8 hours using isopropyl alcohol.
What makes silicone pads essential for pad printing?
Silicone pads are elastic and chemically bond well with ink, allowing them to handle surface irregularities without compromising print quality.
How is ink transfer efficiency ensured on treated plastics?
Surface treatments such as corona and plasma treatment enhance adhesion and improve ink transfer efficiency, achieving up to 98% efficiency.
What speed can modern pad printing machines achieve?
Modern machines can achieve production speeds exceeding 2,500 cups per hour, with cycle rates of 45–60 impressions per minute in food-safe environments.
Table of Contents
- Core Components and Working Principle of a Plastic Cup Printing Machine
- Step-by-Step Pad Printing Process for Plastic Cups
- Design Preparation and Engraving for Custom Plastic Cup Decoration
- Overcoming Challenges in Printing on 3D and Complex-Shaped Plastic Cups
-
Automation, Maintenance, and Quality Control in High-Speed Production
- Integration of Plastic Cup Printing Machine with Forming and Stacking Systems
- Application in Food-Safe and High-Speed Production Environments
- Real-Time Quality Inspection for Print Clarity and Alignment
- Routine Maintenance of Ink Cups, Pads, and Cliché
- Common Issues in Pad Printing Process and Strategies to Minimize Downtime
- FAQ